FMD #41

A few last-minute tweaks. 1950’s hairstyles emulated movie stars and were created by roller or pin curl sets, sometimes employing a hair relaxer first to make the hair smoother and easier to curl. I had modeled the hair after Sally Mae and Dorothy Dandridge and made the hair longer than Fannie Mae had hers for two reasons: to balance the size of the hat and also to act as a technical support buttress to help support the weight of the head and hat (which is very large and heavy!) when in bronze. In the end, however it didn’t reflect Fannie Mae. Luckily Ms. Duncan’s niece spoke up and after a chat we decided to make some final tweaks that also included making the face a bit fuller. I’m ever so grateful that she spoke up because in the end, it’s all about the work and community. I modified the hair by keeping the same style but making it shorter and making the curls tighter but because it still just touches the collar in the back it retains the strength to act as a buttress for the head, neck and hat.

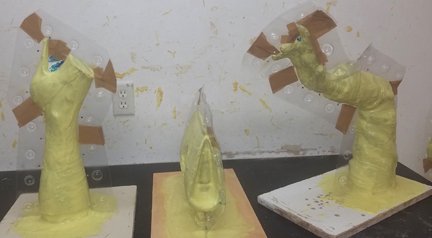
The next part of the bronze process is highly technical and best left to wonderful professionals. I do make some of my more simple molds but it really takes a special eye and thought process to make good multi-piece molds for bronze. Dan Ochs, the mold maker, starts by assessing where to make the cuts. The foundry only casts bronze in about 24” sections at a time so knowing the process of bronze pouring is indespensible. After choosing where to cut the sculpture, he makes spouts made of clay and attaches them to the sculpture sections. This will be where he will be pouring the wax through once all the mold has been made and cured.

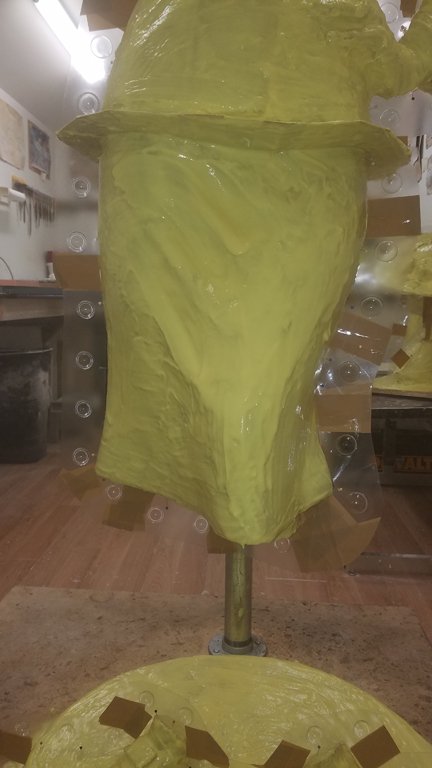
On the large body section shown below you see he has made a little ‘skirt’. This is called a ‘shim’ and will be used to separate the two sections. As there was a large metal support inside of the clay sculpture, it was feasible to cut through it so instead of cutting the sculpture, he divides it into sections using the shim to separate the top from the bottom. You’ll also see that he cut off the legs but left the toe sections of the shoes. This was a calculated choice based on his 30+ years of industry experience in mold making and the best way to cast for bronze.

And now is the first couple of coats of mold rubber. First a mold-release is sprayed onto the clay. Usually made of a type of silicone it ensures that the rubber is be able to be pulled off the sculpture. The rubber is mixed in a ratio and painted onto the sculpture and allowed to cure. Usually 4-6 coats of rubber are needed, sometimes more. The rubber has to be built up to a good thickness to ensure it is strong and to capture all the detail.

The molds also get ‘shims’. After the first two coats of rubber are applied to the entire piece, plastic shims with little bubbles used to register and lock the two halves together are added to the rubber. The point is that the rubber mold will need to opened in order to take the clay out and the put back together in order to cast the wax. So by adding these dividing shim in place Dan will continue to add coats of rubber onto the work and also over the shims. When he has all the coats applied and the rubber has cured, he will cut between the shim and down to the sculpture very carefully and the two pieces will open up to all the sculpture to be removed - sometimes nearly intact and sometimes heavily damaged. The clay is only the starting point for the bronze and is usually destroyed in the process.